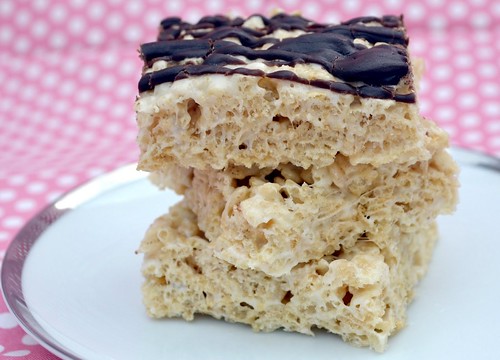

Rice Krispie Treats used to be one of my favorite desserts. They’re so easy to make and they’re delicious.
These are the perfect snack for adults AND kids. They’re like the sophisticated version of regular Rice Krispie Treats, but they’re still fun and easy to make.
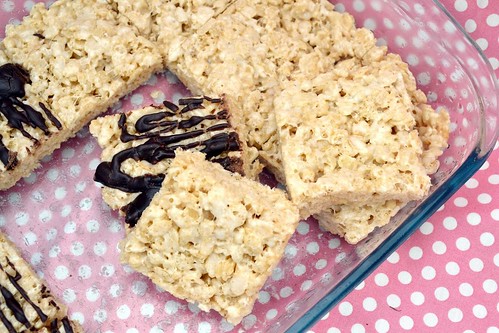
Salted Brown Butter Rice Krispie Treats
Smitten Kitchen
Makes 16 2-inch squares or 32 1- x 2-inch small bars
Ingredients:
4 ounces (1 stick) unsalted butter
1 10-ounce bag marshmallows
Heaping 1/4 teaspoon coarse sea salt
6 cups Rice Krispies cereal (about half a 12-ounce box)
Directions:
- Butter (or coat with non-stick spray) an 8-inch square cake pan with 2-inch sides.
- In a large pot, melt butter over medium-low heat. It will melt, then foam, then turn clear golden and finally start to turn brown and smell nutty. Stir frequently, scraping up any bits from the bottom as you do. Don’t take your eyes off the pot as while you may be impatient for it to start browning, the period between the time the butter begins to take on color and the point where it burns is often less than a minute.
- As soon as the butter takes on a nutty color, turn the heat off and stir in the marshmallows. The residual heat from the melted butter should be enough to melt them, but if it is not, turn it back on low until the marshmallows are smooth.
- Remove the pot from the stove and stir in the salt and cereal together. Quickly spread into prepared pan. I liked to use a piece of waxed or parchment paper that I’ve sprayed with oil to press it firmly and evenly into the edges and corners, though a silicon spatula works almost as well. Drizzle with chocolate, if you’d like.
- Let cool, cut into squares.